OVERVIEW:
The following journal outlines the various steps and evaluation of the process of ASSESSMENT TASK #3- Horror Vacui. The contents of this journal includes the following
-
1.0: PRINTED CONCEPT BOARDS-2 x A3 Printed Concept Board proposals . Print 2 copies of each. (WK8 )
-
1.1: REFINE CONCEPT PROPOSAL & print for consultation (WK 9)
-
1.2: CREATE A 3D COMPUTER MODEL RESPONDING TO THE THEME
‘HORROR VACUI’ -
1.3: CREATE A 3D PRINT OF A SIMPLE GEOMETRIC PROTOTYPE
-
1.4: CREATE A TWO PIECE PLASTER MOULD FROM THE PROTOTYPE
-
1.5: CREATE MIN 2 SLIP CAST FORMS FROM THE PLASTER MOULD (WK12)
-
1.6: EXPERIMENTATION WITH COLOURED SLIP , UNDER GLAZES , COLOURED AND TRANSPARENT GLAZES
-
1.7: DISPLAY MIN 2 FIRED OBJECTS WITH APPLIED SURFACES (WK 15 )
-
1.8: CREATE AN A2 HORROR VACUI PROJECT POSTER (WK 15 )
-
2.0: STUDIO RESEARCH: Completion of 1 elective research exercise exploring your chosen concept. (WK15)
-
3.0: COMPLETED GREENWARE progress checkpoint (WK 12).
-
4.0: VISUAL JOURNAL with an attached 500 word reflection on your course learning experience
The poster will be presented with your finished ceramic work for week 15 assessment.
Week 8 (beginning Mon 12 Sept)
HORROR VACUI CONCEPT:
You will initially develop 2 concepts for a three dimensional modular ceramic forms that respond to the project title, visualising how they connect with each other and /or the immediate built environment, considering the principles of pattern, orientation, growth and transformation. Solutions should be site specific. They can be freestanding or connected to a larger structure or system (such as architecture), and you may consider structures from ‘nano’ to ‘mega’ scale. The modules and their assemblage must be conceived and visualised at a 1:1 size in their intended location, however they may be scaled down for studio fabrication.
The A3 concept boards due in week 8 should include for each proposal: a short conceptual description, sketches, short notes on significant research, no more than 2 precedent images and a timeline diagram showing key process milestones and dates for concept realisation. See the weekly outline for details.
1.1: PRINTED CONCEPT BOARDS-2 x A3 Printed Concept Board proposals
CONCEPT:
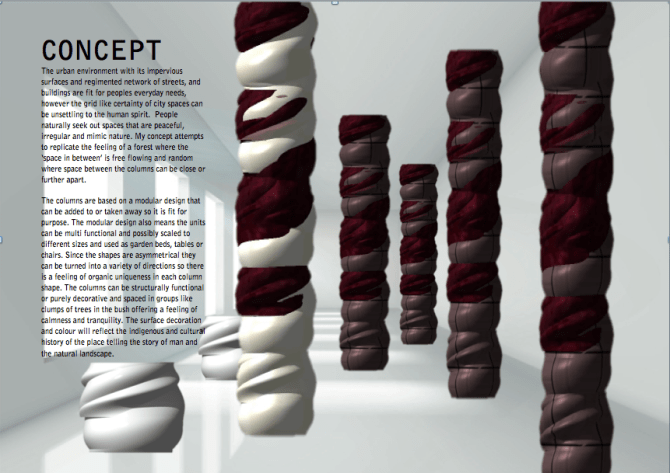
The urban environment with its impervious surfaces and regimented network of streets, and buildings are fit for people’s everyday needs, however the grid like certainty of city spaces can be unsettling to the human spirit. People naturally seek out spaces that are peaceful, irregular and mimic nature. My concept attempts to replicate the feeling of a forest where the ‘space in between’ is free flowing and random where space between the columns can be close or further apart.
The columns are based on a modular design that can be added to or taken away so it is fit for purpose. The modular design also means the units can be multi functional and possibly scaled to different sizes and used as garden beds, tables or chairs. Since the shapes are asymmetrical they can be turned into a variety of directions so there is a feeling of organic uniqueness in each column shape. The columns can be structurally functional or purely decorative and spaced in groups like clumps of trees in the bush offering a feeling of calmness and tranquility. The surface decoration and colour will reflect the indigenous and cultural history of the place telling the story of man and the natural landscape.
CONCEPT:
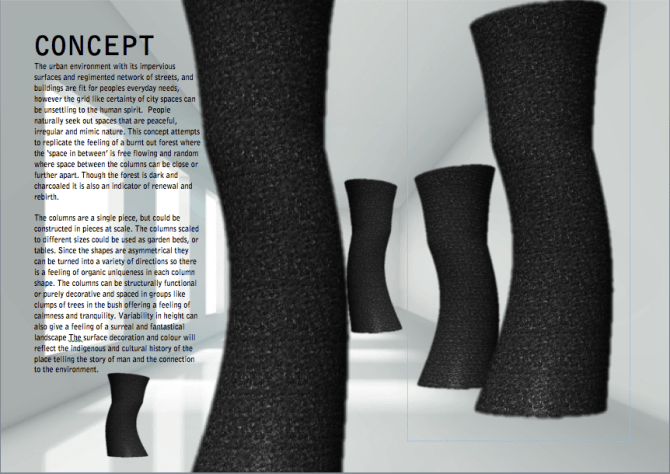
This concept attempts to replicate the feeling of a burnt out forest where the ‘space in between’ is free flowing and random where space between the columns can be close or further apart. Though the forest is dark and charcoaled it is also an indicator of renewal and rebirth.
The columns are a single piece, but could be constructed in pieces at scale. The columns scaled to different sizes could be used as garden beds, or tables. Since the shapes are asymmetrical they can be turned into a variety of directions so there is a feeling of organic uniqueness in each column shape. The columns can be structurally functional or purely decorative and spaced in groups like clumps of trees in the bush offering a feeling of calmness and tranquility. Variability in height can also give a feeling of a surreal and fantastical landscape. The surface decoration and colour will reflect the indigenous and cultural history of the place telling the story of man and the connection to the environment.
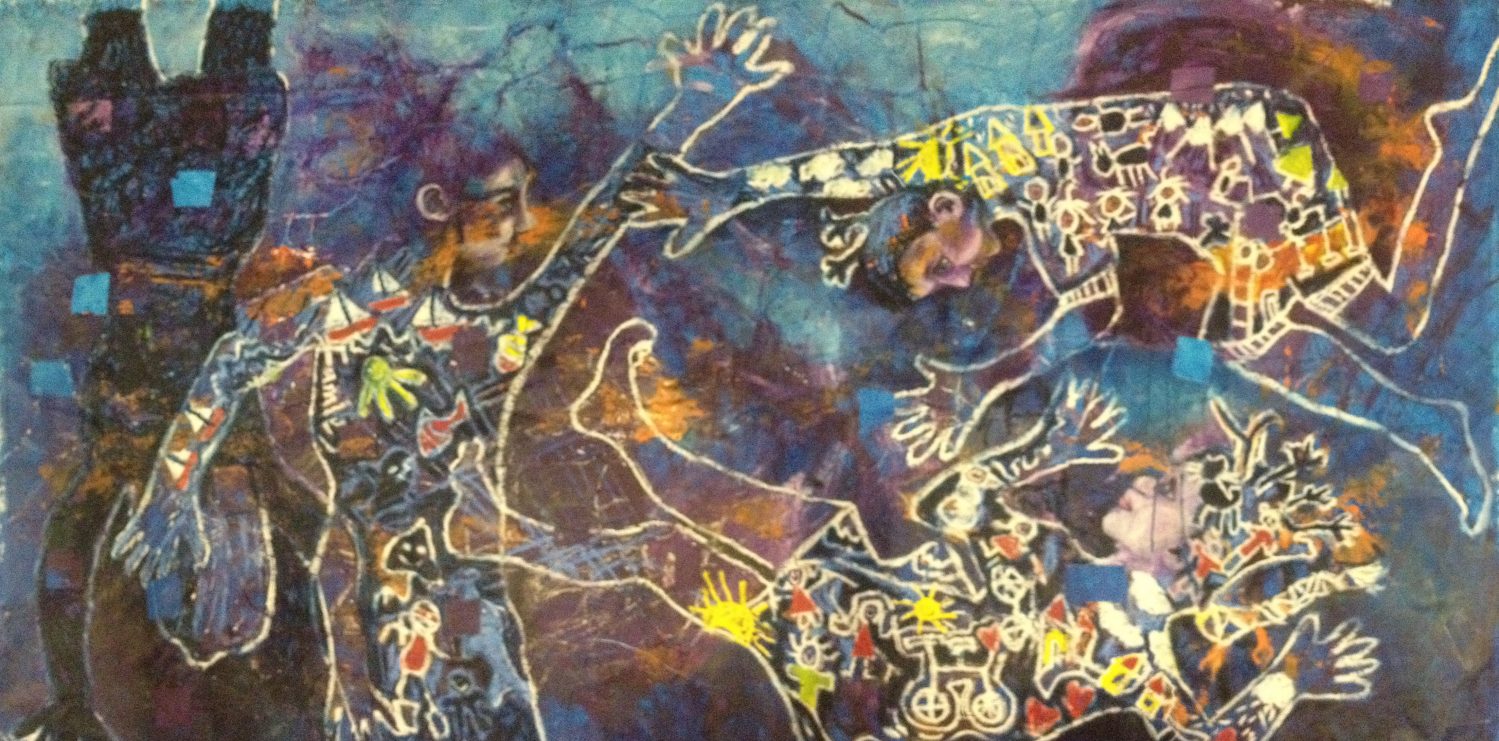
I’d further like to explore variable designs and textures with this work including the textures of trees in the Australian bush.Horror Vacui can be reinforced in the surface texture of the designs of the columns as seen in the examples I’ve started to collect in the slideshow below.
Week 9 (beginning 19th September)
1.2: REFINE CONCEPT PROPOSAL & print for consultation (WK 9 in class)
Week 10 (5th October – 11th October)
TOPIC: Horror Vacui progress and The Graphic Gesture
1.2: CREATE A 3D COMPUTER MODEL RESPONDING TO THE THEME
‘HORROR VACUI’
The prototype for this module may be drawn in 3d computer modelling software or by hand.


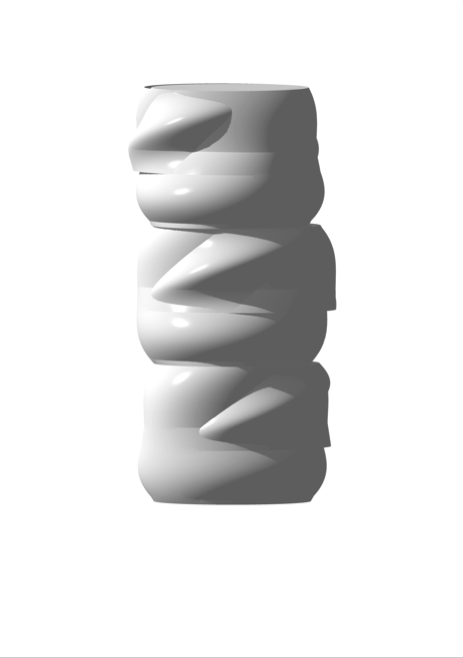
3D Prototype created in Form Z from various views including top, bottom and side.
Final STI file shown.
EVALUATION:
I spent considerable time finalising my idea as I wanted to create something that would be stackable, but also achievable in the little time we have left. Understanding the process and the enormous amount of time involved I’ve kept my design small. I aim to cast at least 4-5 objects and treat the set as one form. Each piece will be decorated in a similar way. I watched the 3D Hub videos again and again to ensure that I was deepening my knowledge of the program and experimented with alot of alternate designs.
I sent this off to 3D hub and have not been caught out last time with the cost. This time the quote came in at $64 which is manageable. I could not find the place where I could upload my work to the UNSW Makerspace. Hopefully someone can point this out for me next time. The prototype will be available for pickup on Thursday at the latest from Ultimo.
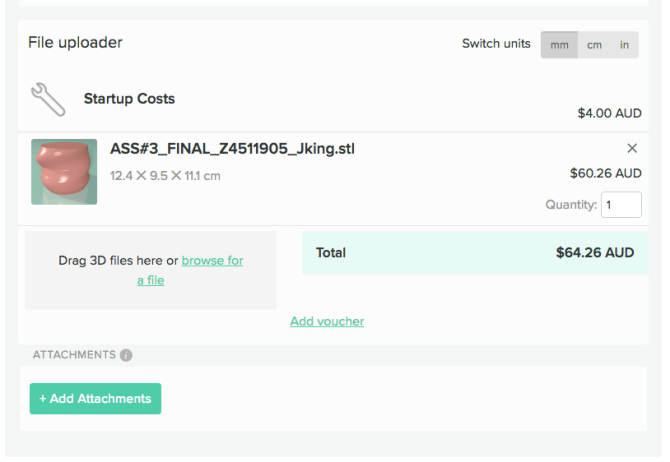
PROTOTYPE picked up. A little rough along the top and bottom edges and on the top surface, but overall I’m very pleases with the results. I’m feeling so much more confident that I will do a better job this time around.

A video David shared in class. Fabulous!
Week 11 (12th October – 18th October)
TOPIC: Attachment
Demonstration/ Discussion: Connecting Ceramic Objects
ACTIVITIES:
This week we explore ways of creatively engaging with ceramics in an expanded interpretive material context. We will discuss methods of working with the physical properties of fired ceramic for installation in the built environment : modifying brittle materials, assembling ceramics using adhesives , reinforcing materials, and mounting strategies; considering the visual, acoustic, tactile and functional properties of ceramics. Some of the processes explored include cutting, breaking, bolting, glueing, tying and linking.
There will also be a short demonstration on sand casting and burnout casting.
Greenware must be dry and on the bisc shelves by week 12 to ensure firing is completed for assessment.
2.0: STUDIO RESEARCH: Completion of 1 elective research exercise exploring your chosen concept. (WK15)
2. Modify a ‘found’ ceramic object by dissectIng, reassembling, fragmenting and adding to it another fired clay component, responding to the ideas of ‘parasite’.
I managed to complete this after the last bisque firing, but understand the concept and idea behind this. I used a broken pot that I had salvaged from a fall, recovering at the time from a knee operation. The pot was significant as I managed to put it back together and discovered an almost perfect hole where the pot had absorbed my fall the rest broke in manageable pieces. I kept it wrapped in sticky tape on my shelf and used this for this exercise. It was fun, however I wasn’t quite sure why it cracked so much?

1.4: CREATE A TWO PIECE PLASTER MOULD FROM THE PROTOTYPE
You will create a working mould from the prototype.
TWO PIECE MOULD PROCESS:
- Prepare the prototype for encasing in the clay and for plaster coverage. Sand down the surface thoroughly using a medium grade sandpaper.
- Cover the prototype in Beeswax Polish followed by a layer of spray on wax
- Position the prototype onto a wooden board with clay ensuring the shape is level.
- Find the centre line of the model by rubbing graphite onto a ruler and holding the image steady run the ruler along the shape to create the centre line. This will ensure there will be no undercut in the mould and the prototype will be placed exactly in the centre of the mould.


- Once this is complete, prepare the mould for plaster. Following the directions from the studio chart. Approx 2:1 plaster to water.


- Remove the clay surrounding the top half of the prototype. DO NOT REMOVE THE PROTOTYPE AS IN THIS EXAMPLE. Add the registration keys using a 10 or 20 cent piece


- Once the plaster has become hot the cottle can be removed. The two part mould can be pried appart with gentle force and hot water.


- The prototype should gently come away with a little pressure and the air gun if required.
- FINALLY, put both halves into the drying cabinet until completely dried. Usually 203 days depending on how many other moulds are in the cabinet. Its important that the moulds are completely dried before casting.
EVALUATION:
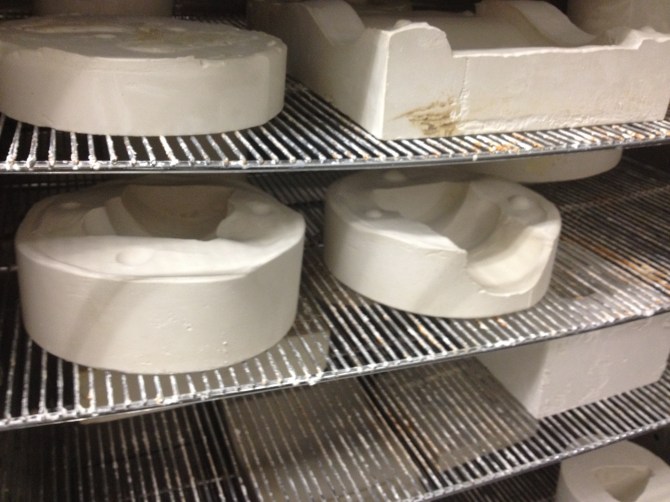
I worked closely with my teacher David on this to ensure i was understanding the process so i didn’t experience the disaster like last time. However, I initially prepared my mould with the slip soap and more was added to the prototype before it was cast on the second half. As a result the plaster mould seemed to crumble and come away, while the other side was perfect. My feeling is the soap had not tried adequately and had degraded the plaster. David was of the opinion that their wasnt enough plaster included in the mix.
Either way, we decided to cast it again using only the Beeswax Polish and the spray on Liquid Wax to prepare the prototype. I reinserted the prototype into the original cast. Rod, then advised to wet this half thoroughly to allow for reciprocity. Once half of the pouring spout was filled with clay, I recast with brilliant results. However, this took the best part of 4 days to dry so I continued casting from my original mould so I didn’t loose time.


1.5: CREATE MIN 2 SLIP CAST FORMS FROM THE PLASTER MOULD (WK12)
Cast ceramic modular forms using liquid casting slip.
I cast these timing each for 20 minutes. David advised these were on the thin side so I increased the time to 25MIN. Each cast form popped out of the mould without a problem. I cleared them up as I went.Very easy. Felt very pleased.

I slipped cast 6 separate forms

I joined three forms together with slip to match my design
Week 12 (19th October – 25th October)
TOPIC: The ceramic cycle
Demonstrations on spray glazing, airbrushing, specific firing and finishing requirements.
ACTIVITIES:
Consultations on finishing project work
This week we revisit fundamentals of ceramics practice and concentrate on more advanced glazing and finishing strategies, often the most critical stage of the process. A focus on details of specific surface finishes, glaze application and kiln firing requirements will be discussed in the context of your developing project work.
Greenware must completely dry this week to ensure firing is completed for assessment. Class checkpoint.
1.6: EXPERIMENTATION WITH COLOURED SLIP , UNDER GLAZES , COLOURED AND TRANSPARENT GLAZES
After completing the cast modules ( which may be augmented ceramic or other material components)


I used a clipping mask in photoshop to test my ideas. I like the organic textures and will apply 3 to my pots.
EVALUATION:
I did not get a chance to do any glazing practice as I was caught up trouble shooting the recasting of my mould.
EXPERIMENTATION:
Time was running out so decided to play safe and use the underglazes that I had purchased and to use wax resist and shellac as mediums to help build up layers of colour and texture in my designs. I was unsure how these were going to turn out, but followed my instincts and experimented regardless.


Week 13 (26th October – 1st November)
TOPIC: Presentation and Context
Lecture : Concepts and Context
What makes a good poster. Strategies for conveying concepts, scale and context.
ACTIVITIES:
Our last formal class class will be dedicated to project completion and presentation. Come to class with ideas and sketches for the display of your work, poster ideas and documentation. Discussion and consultations will focus on finishing and presenting work , including glaze, post firing finishes and assembly ideas.
Glaze firing . Last week for bisc firings.
RESULTS:
All worked out well. However, I spent considerable time on my main tower piece rubbing back the shellac and wax resist to reveal the glazes underneath. Not certain how it will all turn out.
Week 14 (2nd November – 8th November)
No Classes – Studio access week for project completion and documentation.
Last week for glaze firings. Post firing work finishes and assembly.
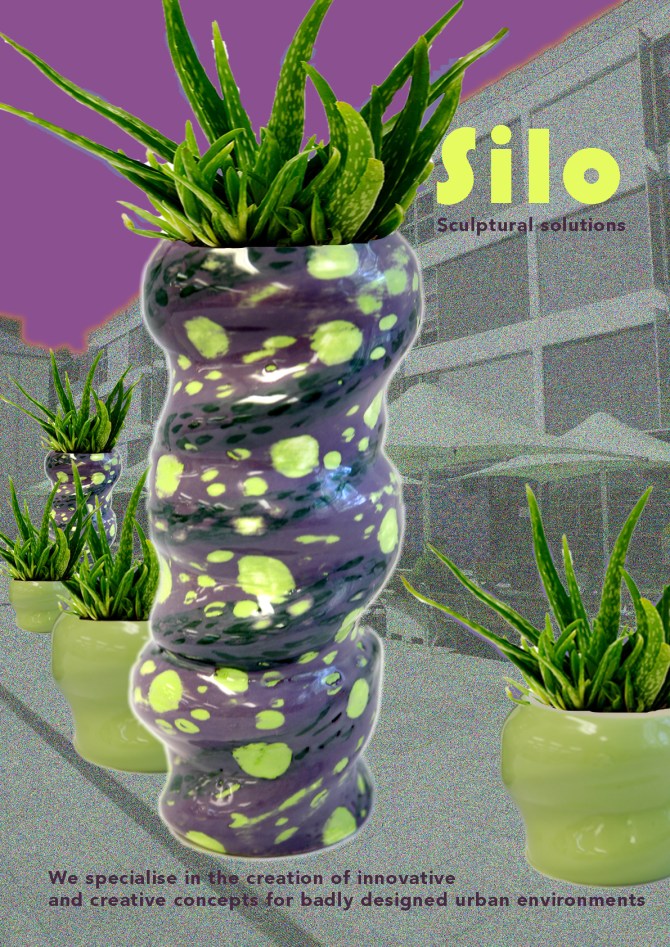
You will prepare an inspiring A2 poster to contextually situate your assemblage at the appropriate scale, using photomontage and /or computer graphic imaging techniques. The poster will be presented with your finished ceramic work for week 15 assessment.
Week 15 (9th November – 15th November)
FINAL:
-
1.7: DISPLAY MIN 2 FIRED OBJECTS WITH APPLIED SURFACES (WK 15 )


-


-
1.8: CREATE AN A2 HORROR VACUI PROJECT POSTER (WK 15 )
-
2.0: STUDIO RESEARCH: Completion of 1 elective research exercise exploring your chosen concept. (WK15)
-
4.0: VISUAL JOURNAL with an attached 500 word reflection on your course learning experience.
- Learning experience! Well there has been a huge learning curve for me this term in ceramics. It was the first ceramics class I completed and I’m still in shock over the amount of work and time it has taken to complete all tasks. It certainly was mammoth! With a full study load, my only regret is that my other subjects have suffered.
I did learn a lot, however as I’ve mentioned in my journal. I was particularly overjoyed with my learning in Form Z and in the successful creation of my prototype. This took over 20 hours of experimentation and playing with the software. I can happily say that I now have a handle on how this program works.
The creation of the two-part mould was an accomplishment. Even though there were gremlins in the process I was very pleased with my final form, which I’m happy to cast again. This success was due to the patience and help of David, whom I drove crazy with my questions. I would not have completed the task as well without his help. He really did go the extra mile to get me over the line.
The glazing process was very rushed due to lost time with my recreation of one side of my plaster mould. I had to make do with a different colour palette as I ran out of black, but in hindsight this wasn’t a bad thing. I madly tried to finish all pieces before the final bisque, which I made down to the wire. I created about three or four layers with my final pieces as I was interested in creating multilayered textured effect similar to what I would do in painting. I would like to explore the best way to do this again for next time. I would think twice about using shellac again for a resist technique and would only use the wax instead as I achieved better results.
The final dipping in the clear gloss worked out okay, but the surfaces of some pieces were either milky or mottled in texture. Not perfect, but overall, I was pleased. I feel like I’ve climbed a mountain in this course. It certainly has been a challenge time wise and in the learning of so many new skills, but feel a sense of accomplishment nonetheless. Thank you!
